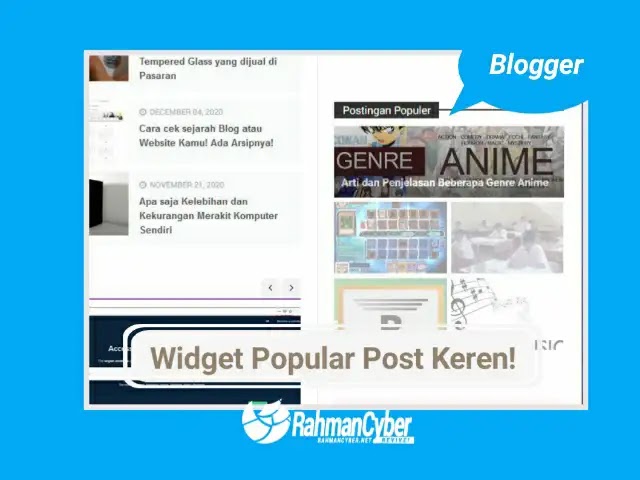
How to make a responsive flat popular post widget for blogger
But as usual, when the popular post widget has not been modified, it will use the default appearance of all your templates.
This is actually also useful so that your blog is different from the user of the same template template, so that it has certain characteristics ... even though we are not here to learn to create CSS for widgets, but rather just install some existing and developed CSS.
So just put in the code.
How to Install a Flat Responsive Popular Post Widget?
1. Please select the desired appearance in this Popular Post Widget Post.
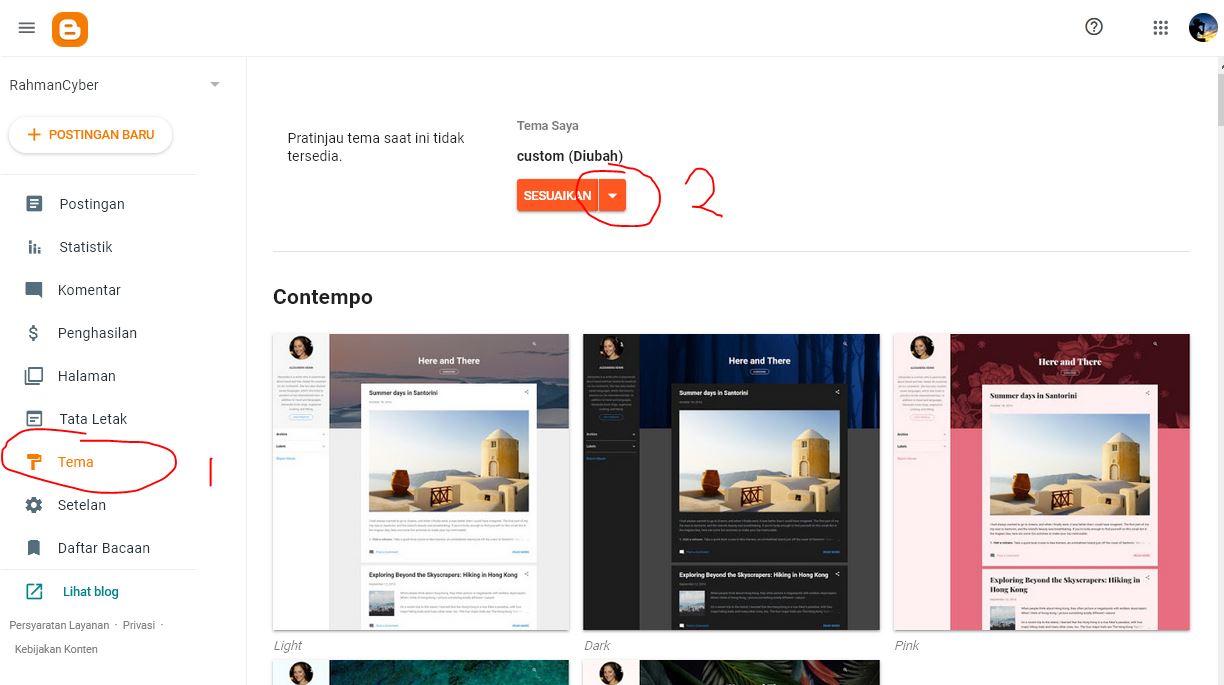
2. Next, please go to your blog dashboard
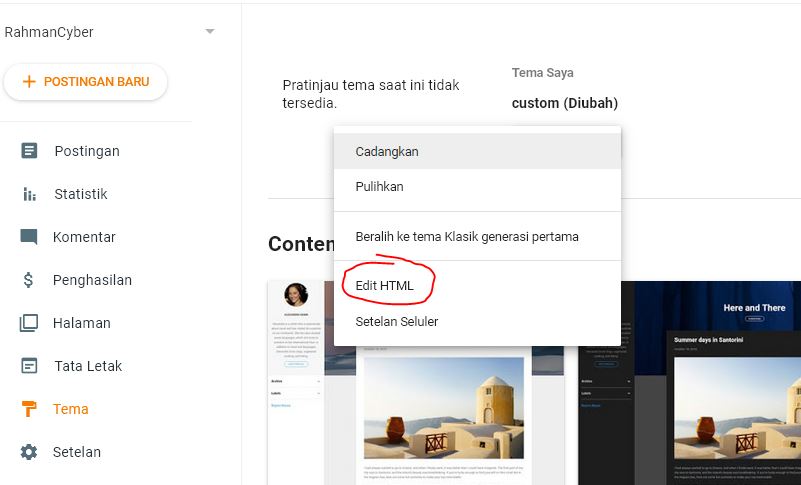
3. Please enter the Theme Menu, after that select the down triangle icon, then you select Edit HTML
As shown in the picture above, the steps ... if your blog settings are in English, is it usually 'THEME'
After that you select edit html as shown above.
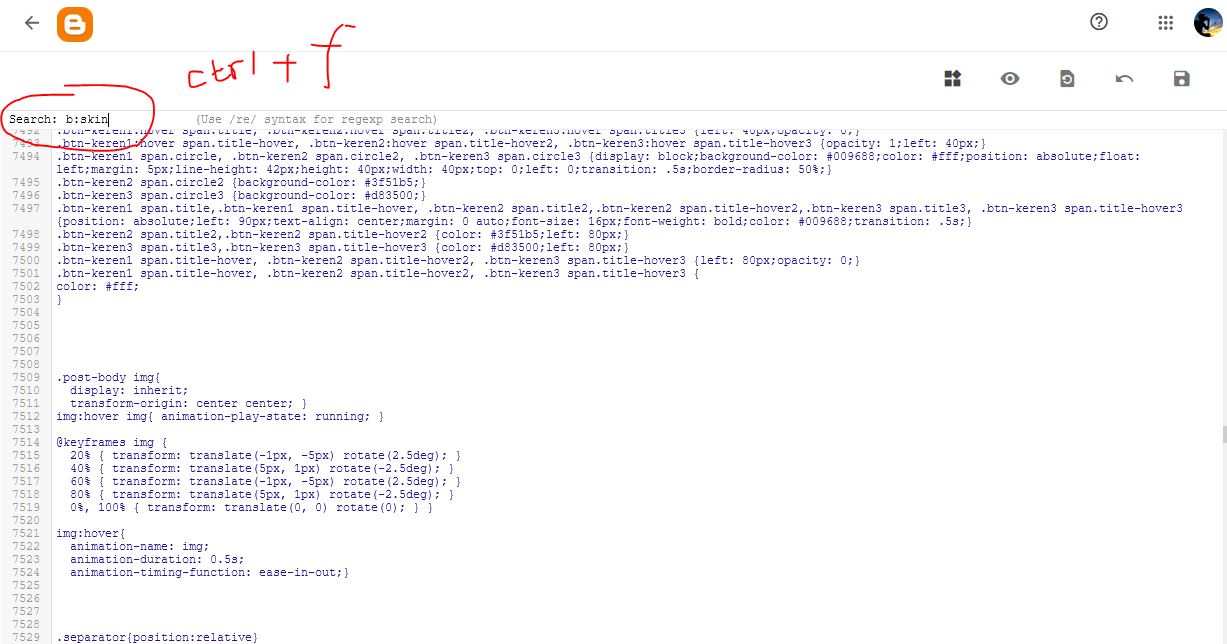
4. Then you can use the CTRL + F key combination on the keyboard and type b: skin, you enter until you find the b: skin that is like the picture.
See you b: skin like this or b: skin with a closing tag.
So, if you have ... please put the Popular Post Widget code that you like / you choose right above the code I circled so there is no error. Position as shown.
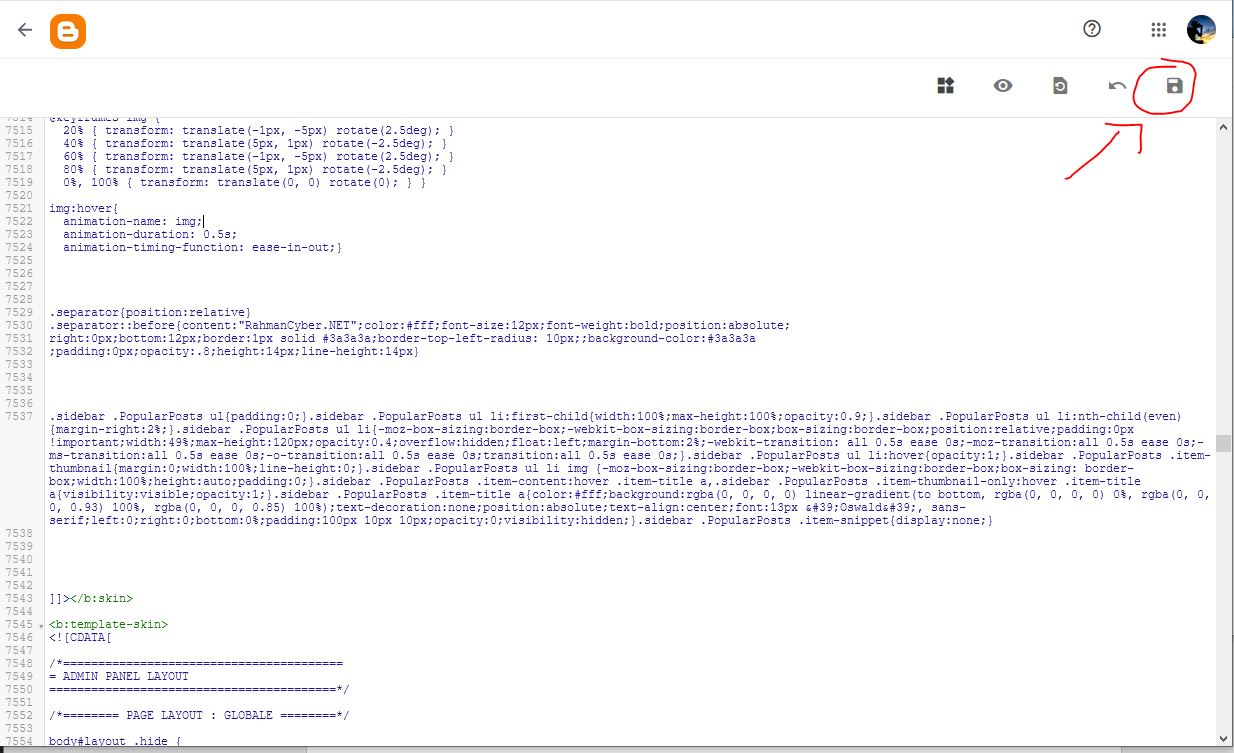
5. If you have, please save it, friend, for example as shown below ...
Okay, until here, the Edit Html is finished, friend.
So many ways to add CSS code to Blogger safely through Edit HTML
......
How to Add Widgets in Blogger Layout
Okay, please take the next step for you to immediately add / add the popular post widget in your layout.
If the dialog box will appear like this ...
Maybe it's different in your language, because, i get it from my indonesian blog, but.. icon it's same
Please select the desired Widget / Gadget. If in this case we choose Popular Post.
Then then the Popular Post Widget setting options will appear like this
In part number 2, we can set the popular post interval / some sort of period ... it can be based on the last 7 days, 1 month, last year, or the whole (meaning that the posts get the most views)
In part number 4, you can determine how many entries or popular posts are displayed, a maximum of 10.
After that step number 5 is save.
Then Popular Post will appear according to its placement.
For the code below it only works in the Sidebar ... so if it is placed in the footer or above the post / main it will not work.
........
My Popular Post Widget Collection
Here are some collections of Popular Post Widgets that we have, please choose according to your pleasure.
1. Popular Post Layout Grid
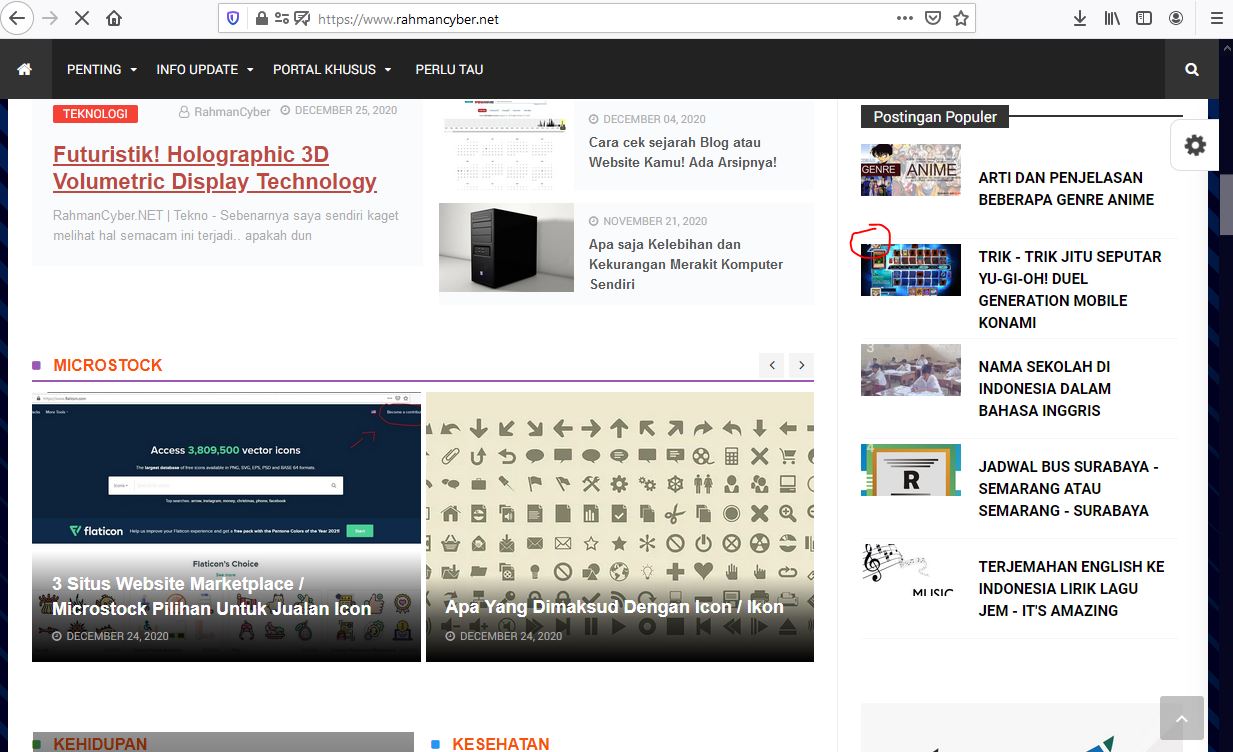
This appearance is actually almost similar in concept to the RahmanCyber NET theme, only this is so that it can be used in other universal templates, the model is in the form of a grid like this.
GRID CSS code:
.sidebar .PopularPosts ul{padding:0;}.sidebar .PopularPosts ul li:first-child{width:100%;max-height:100%;opacity:0.9;}.sidebar .PopularPosts ul li:nth-child(even){margin-right:2%;}.sidebar .PopularPosts ul li{-moz-box-sizing:border-box;-webkit-box-sizing:border-box;box-sizing:border-box;position:relative;padding:0px !important;width:49%;max-height:120px;opacity:0.4;overflow:hidden;float:left;margin-bottom:2%;-webkit-transition: all 0.5s ease 0s;-moz-transition:all 0.5s ease 0s;-ms-transition:all 0.5s ease 0s;-o-transition:all 0.5s ease 0s;transition:all 0.5s ease 0s;}.sidebar .PopularPosts ul li:hover{opacity:1;}.sidebar .PopularPosts .item-thumbnail{margin:0;width:100%;line-height:0;}.sidebar .PopularPosts ul li img {-moz-box-sizing:border-box;-webkit-box-sizing:border-box;box-sizing: border-box;width:100%;height:auto;padding:0;}.sidebar .PopularPosts .item-content:hover .item-title a,.sidebar .PopularPosts .item-thumbnail-only:hover .item-title a{visibility:visible;opacity:1;}.sidebar .PopularPosts .item-title a{color:#fff;background:rgba(0, 0, 0, 0) linear-gradient(to bottom, rgba(0, 0, 0, 0) 0%, rgba(0, 0, 0, 0.93) 100%, rgba(0, 0, 0, 0.85) 100%);text-decoration:none;position:absolute;text-align:center;font:13px 'Oswald', sans-serif;left:0;right:0;bottom:0%;padding:100px 10px 10px;opacity:0;visibility:hidden;}.sidebar .PopularPosts .item-snippet{display:none;}
2. Numbering Popular Post
Popular Post with Numbering on the left, like this (maybe it can be different for each template)
Popular Post Numbering CSS Code:
.sidebar .PopularPosts ul{counter-reset:popularcount;margin:0;padding:0;}.sidebar .PopularPosts ul li{float:left;max-height:130px;min-width:250px;position:relative;}.sidebar .PopularPosts .item-thumbnail::after{color:rgba(255,255,255, 0.63);content:counter(popularcount, decimal);counter-increment: popularcount;font:70px 'Oswald', sans-serif;list-style-type:none;position:absolute;left:5px;top:-5px;z-index:4;}.sidebar .PopularPosts .item-thumbnail::before{background:rgba(0, 0, 0, 0.3);bottom:0px;content:"";height:100px;width:100px;left:0px;right:0px;margin:0px auto;position:absolute;z-index:3;}.sidebar .PopularPosts .item-thumbnail a{clip:auto;display:block;height:auto;overflow:hidden;}.sidebar .PopularPosts .item-thumbnail{width:100px;height:100px;margin:0px 10px 0px 0px !important;position:relative;}.sidebar .PopularPosts .item-thumbnail:hover:before{display:none;}.sidebar .PopularPosts .item-thumbnail img{position:relative;padding-right:0px !important;height:auto;width:100%;}.sidebar .PopularPosts .item-title{font:13px 'Oswald', sans-serif;text-transform:uppercase;padding:0px 5px 10px;}.sidebar .PopularPosts .item-title a{color:#000;text-decoration:none;}.sidebar .PopularPosts .item-snippet{font:13px "Times New Roman",Times,FreeSerif,serif;}.sidebar .PopularPosts .widget-content ul li{padding:0px 5px 0px 0px !important;}.sidebar .PopularPosts .item-content{padding:5px 0px;border-bottom:1px dotted #dedede;overflow:hidden;height:100px;position:relative;}
Closing
Actually using the widget itself will affect the speed of your site to load, so my advice ..
If you feel it is needed, you can use it ... but if you feel it is not really needed, you can not use it.



Post a Comment for "How to make a responsive flat popular post widget for blogger "